MFA
FAQ & Guide: How to Enable Multi-Factor Authentication (MFA) for Microsoft 365
FAQ & Guide: How to Enable Multi-Factor Authentication (MFA) for Microsoft 365
What is MFA?
Multi-Factor Authentication (MFA) requires you to provide two or more verification methods to access your account, adding extra security beyond just your password.
Why is MFA important?
MFA helps protect your account from unauthorized access, even if your password is compromised.
When will MFA be enforced?
Starting 28 January 2026 MFA will be mandatory for all IIUM Microsoft 365 @live users.
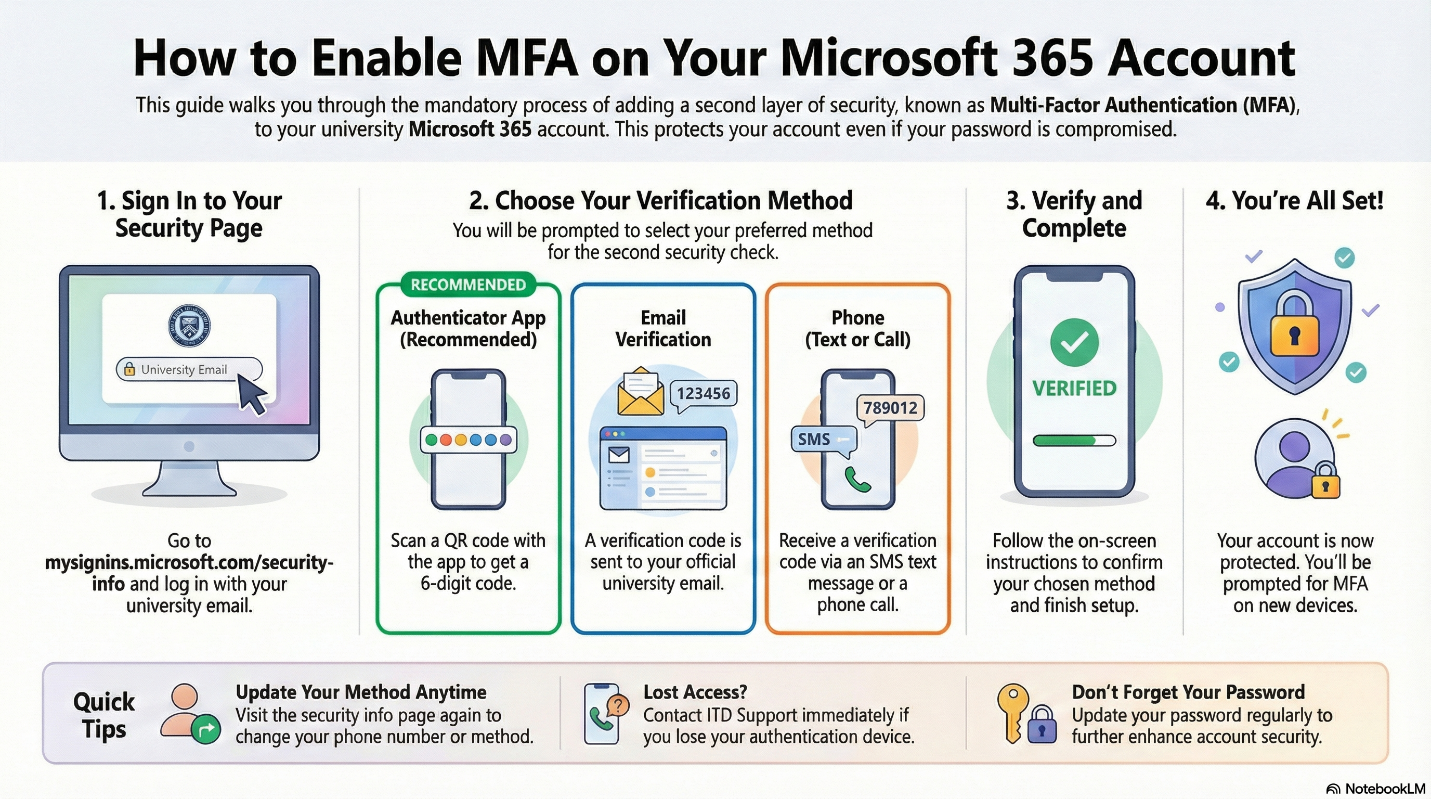
How to set up MFA on your Microsoft 365 account:
Step 1: Install Google Authenticator
- Open the Google Play Store (Android) or Apple App Store (iOS) on your mobile device.
- Search for “Google Authenticator”.
- Select Google Authenticator by Google LLC.
- Tap Install and wait for the installation to complete.
- Once installed, open the app to begin the MFA setup process.
Video Guide:
For a step-by-step video on installing Google Authenticator, please refer to:
https://youtu.be/Aoe1HvtWCKs?si=xjubS-wN1HJnrpky
Step 2: Sign in to your Microsoft 365 account
- Go to https://mysignins.microsoft.com/security-info
- Enter your IIUM @live email and password.
Step 3: Begin MFA registration
- You will be prompted to start the MFA setup process.
Step 4: Choose Your Preferred Verification Method
You can select from the following options:
Google Authenticator App (Recommended)
- Open the app and tap “+”.
- On the Microsoft 365 setup screen, click “Set up a different authentication app.”
- Select “Scan a QR code.”
- Scan the QR code displayed on the screen.
- Enter the 6-digit code shown in the app to complete the setup.
Email Verification
- Use your IIUM email address for verification:
- Staff: @iium.edu.my
- Students: @student.iium.edu.my
Phone Number (Text or Call)
- Enter your mobile phone number and choose to receive a verification code via SMS or phone call.
Step 5: Complete the setup
- Follow the on-screen instructions to verify your chosen method.
- Confirm setup by approving a test notification or entering a code.
Step 6: You're done!
- Your account is now protected with MFA.
- You will be prompted for the second verification each time you log in from a new device or browser.
Tips and reminders:
- The Authenticator app provides the best security and ease of use.
- Keep your phone accessible when signing in.
- Update your phone number or authentication method anytime via https://mysignins.microsoft.com/security-info
- Contact ITD Support if you lose access to your authentication method.
- Also don’t forget to update your password regularly to further enhance account security
SSO MFA User Manual
Dear All IIUM Staff and Students,
Assalamu’alaikum wbt,
Please be informed that the Information Technology Division (ITD) is enforcing Multi-Factor Authentication (MFA) / 2-Step Verification for all IIUM Google accounts that have not yet set up MFA.
Google 2-Step Verification Guide
Why is this necessary?
Every month, approximately 5 to 6 IIUM Gmail account credentials are compromised.
Implementing 2-Step Verification adds an essential layer of security to safeguard your official email, personal data, and university information from cyber threats.
Action Required by 30th September 2026
All staff and students who have not yet enabled Google 2-Step Verification are required to complete the enrollment process on or before 30th September 2026.
Important: Please do NOT wait until the final deadline to enroll. Enrolling early will prevent potential account lockouts and ensure a smooth transition before enforcement begins.
How to Set Up Google 2-Step Verification
We have attached a step-by-step user guide to this email (Google 2-Step Verification Setup Guide).
Quick Summary of Steps:
-
Prepare Your Mobile Device: Download and install the Google Authenticator app from the Google Play Store or Apple App Store.
-
Access Security Settings: Log in to your IIUM Google Account on a desktop browser. When prompted with "Don't get locked out", click ENROLL.
-
Set Up Authenticator: Go to 2-Step Verification > Second steps > Authenticator.
-
Link Your Device: Open the Google Authenticator app on your phone, tap the + icon, select Scan a QR code, and scan the code shown on your desktop screen.
-
Verify & Activate: Enter the 6-digit code generated by the app on your computer, click Verify, and then click Turn on to finalize.
Need Assistance?
If you encounter any technical issues during the setup process, please reach out to the ITD Service Desk:
-
Email: servicedesk@iium.edu.my
-
Extension: Ext. 6666
-
WhatsApp: 016-9832415
Thank you for your cooperation in keeping our IIUM digital community secure.
Wassalam,
Information Technology Division (ITD)