Wordfence Two-Factor Authentication (2FA)
Guide to setting up and using Wordfence Two-Factor Authentication (2FA).
User Registration for Two-Factor Authentication (2FA)
To enhance the security of your account, kindly complete the Two-Factor Authentication (2FA) registration after the first login.
Before proceeding, please ensure that you have installed an authenticator application on your mobile device, such as Google Authenticator or Microsoft Authenticator.
 Google Authenticator
[Click Here] How to Download & Install Google Authenticator App in 2026
 Microsoft Authenticator
[Click Here] How to Download & Install Microsoft Authenticator App in 2026
Once the authenticator application has been installed, please follow the steps below.
Step 1: Log in to WordPress
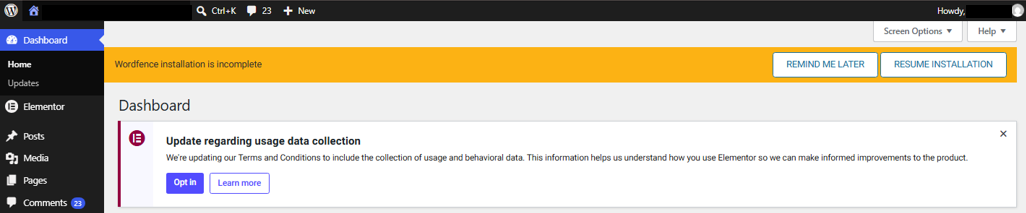
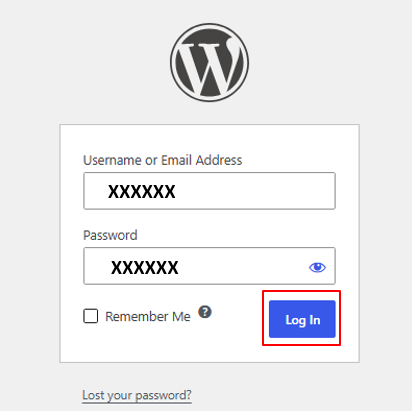
Log in to the WordPress Dashboard using your username and password.
Step 2: Open Wordfence
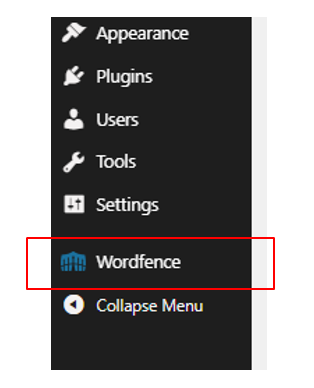
From the WordPress Dashboard, locate the menu on the left-hand side.
Click Wordfence.
Step 3: Open Login Security
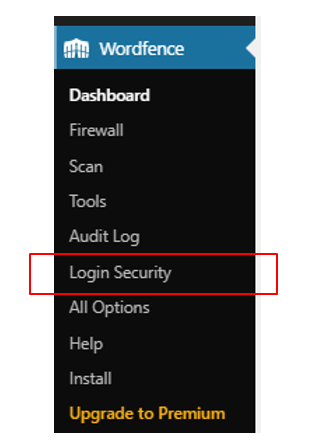
From the Wordfence menu, click Login Security.
Step 4: Open the 2FA Setup
On the Login Security page, locate the Two-Factor Authentication section.
Under Scan Code or Enter Key, a QR code and authentication key will be displayed.
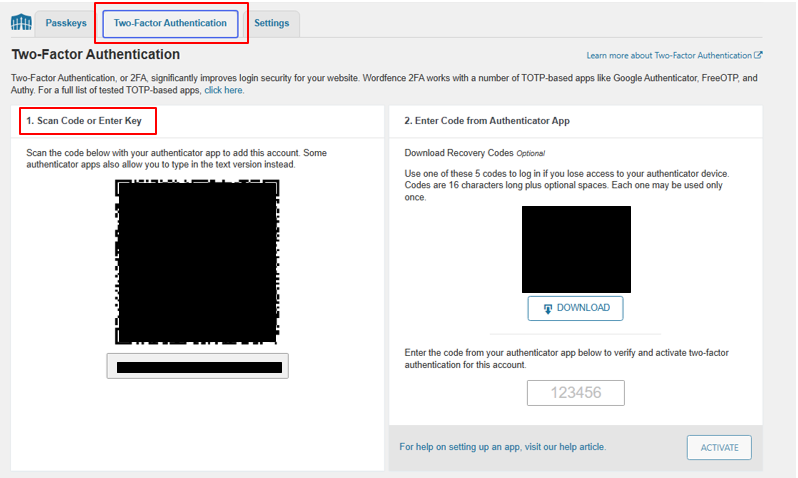
Important: Do not share the QR code or authentication key with anyone, as they can be used to generate verification codes for your account.
Step 5: Scan the QR Code
Open your authenticator application on your mobile device.
In the authenticator application, select the option to add a new account and scan the QR code displayed under Scan Code or Enter Key.
Examples of supported authenticator applications include:
- Google Authenticator
- Microsoft Authenticator
Step 6: Enter the Verification Code
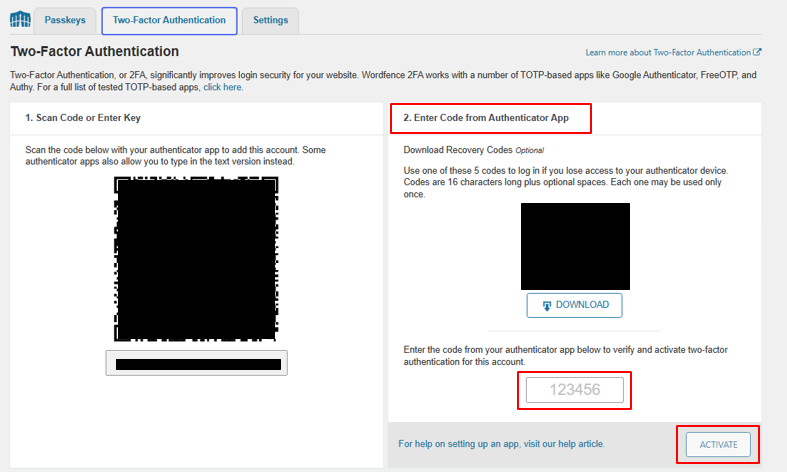
After scanning the QR code, the authenticator application will generate a verification code.
Enter the current verification code into the Enter Code from Authentication App field.
Step 7: Activate 2FA
Click Activate.
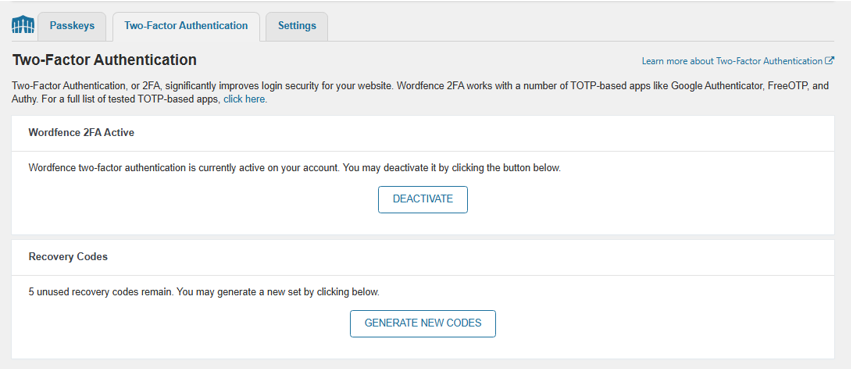
Once the verification is successful, Two-Factor Authentication (2FA) will be activated for your account.
Step 8: Complete Registration
Once 2FA has been successfully activated, the registration process is complete.
From your next login onwards, you will be required to enter the verification code generated by your authenticator application after entering your WordPress username and password.
Important Notes
- Keep your authenticator application accessible whenever you need to log in to the WordPress Dashboard.
- Do not share your QR code, authentication key, or 2FA verification code with anyone.
- If you change or lose your mobile device, contact the designated website administrator or IT Support for assistance in restoring access to your account.
Login with Two-Factor Authentication (2FA)
After Two-Factor Authentication (2FA) has been activated, future logins to the WordPress Dashboard will require an additional verification step.
Step 1: Open the WordPress Login Page
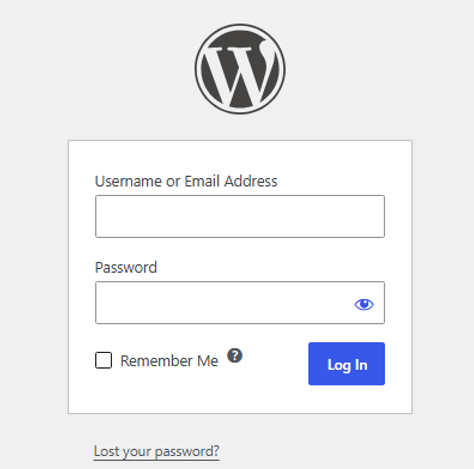
Open the WordPress login page.
Step 2: Enter Username and Password
Enter your username and password as usual.
Step 3: Click Log In
Click Log In.
Step 4: Enter the 2FA Verification Code
After your username and password have been successfully submitted, Wordfence will prompt you to enter your Two-Factor Authentication (2FA) verification code.
Open the authenticator application that you used to set up 2FA.
Locate the verification code associated with your WordPress account.
Enter the current verification code into the 2FA Code field.
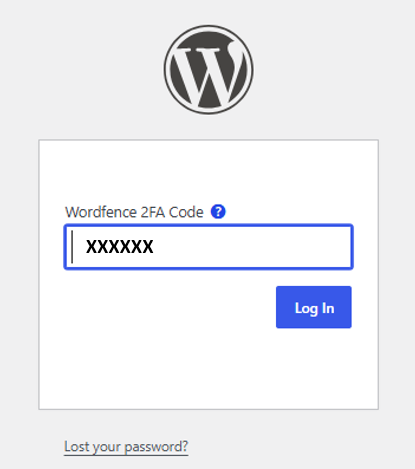
Note: The verification code changes automatically every 30 seconds. Please enter the current code displayed in your authenticator application before it expires and changes to a new code.
Step 5: Access the WordPress Dashboard
After the verification code has been successfully verified, you will be granted access to the WordPress Dashboard.